


Gear
Most cycling accessory lists are written for shopping, not for riding. This one is written for a single purpose: capturing the ride well, without carrying things you will never use.
There is no shortage of cycling accessory advice, and most of it is optimised for buying rather than riding. The question that actually matters is narrower: what helps you come home with footage worth keeping?
These are the accessories that earn their place in a recording setup, plus the reasoning behind each.
Start with capture, not accessories
The first decision is how you capture, because everything else depends on it. A mount-based setup needs brackets, spare batteries, and often a case. A wearable setup needs considerably less.
If the camera is on your face, most of the traditional accessory list becomes irrelevant. There is nothing to mount, no bracket to align, and no separate device to remember. That is a real reduction in what you carry, and it is the main practical argument for the format.
Everything below is worth considering on top of that base.
The accessories that help
1. A way to control capture without stopping
This is the highest-value addition for anyone recording on the move. Reaching for a phone mid-ride is awkward at best and unsafe at worst.
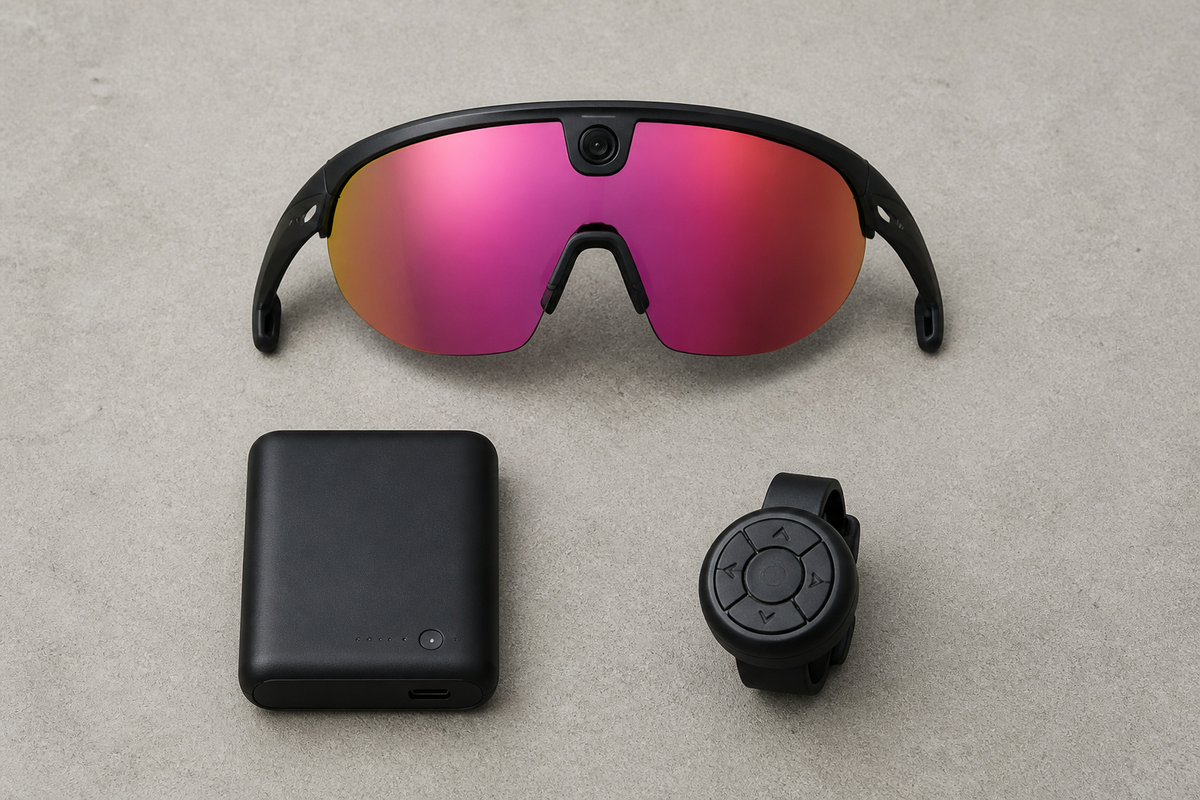
A bar-mounted Bluetooth Controller starts and stops capture from the handlebars. It means the moment you wanted to record is not lost to fumbling, which matters more than any image-quality upgrade.
2. Extended battery for long rides
Recording is power-hungry, and the constraint arrives sooner than most riders expect. Short clips are undemanding; continuous capture is not.
Rover records up to about one hour of continuous video from the glasses, and with its own power bank that extends to roughly five hours of recording, subject to settings and conditions. If your rides regularly exceed an hour, this is the accessory that changes what is possible rather than simply adding convenience.
Practical note:: runtime varies with capture settings, temperature, and usage. Plan power against your longest realistic ride, not your average one.

3. Lens options that match the light
Recording glasses are still glasses, and the lens affects both comfort and footage. Swapping lenses between bright midday sun and low evening light is a genuine improvement to the experience, and it costs nothing in weight.
This is the accessory category most riders underestimate, because it is not obviously a "camera" decision.
4. A charging plan
For touring and long days, charging is the constraint that catches riders out. A small power bank and a cable are unglamorous but decisive: without them, the return leg of a long day goes unrecorded.
5. A compact way to carry it all
A frame bag or small handlebar bag keeps power, cables, and spare lenses accessible without a backpack. On a recording-focused ride, the goal is that nothing requires stopping to retrieve.

What you can leave behind
For completeness, these are commonly recommended and rarely needed for recording specifically:
- Multiple mounts and adapters. Useful only if you also use the camera elsewhere.
- A dedicated action-camera case. Bulky, and unnecessary if nothing is being carried loose.
- Spare memory cards. Relevant for continuous high-bitrate recording, largely irrelevant for short clips.
- Tripods and mini-stands. Rarely usable mid-ride; better saved for planned filming sessions.
The pattern is that recording accessories earn their place by removing a reason not to record. Anything that adds setup friction without improving capture is working against you.
Match the setup to the ride
| Ride type | What actually matters |
|---|---|
| Short evening loop | Nothing; capture and go |
| 2–3 hour road ride | Capture control, one lens option |
| All-day ride | Extended battery, charging plan |
| Gravel ride | Lens protection, storage for a spare layer |
| Touring | Charging and storage dominate everything |
A short buying order
If you are building a recording setup from scratch, this order gets the most improvement per purchase:
1. A capture method that requires no setup — otherwise nothing else matters 2. Capture control so you can start and stop while riding 3. Power for your longest realistic ride 4. Lens options for changing light 5. Carrying and charging for longer days
Notice that image quality does not appear. For most riders, the limiting factor is not sensor performance but the friction of recording at all.
For a broader look at what belongs in a cycling kit, see cycling essentials that earn their place. On power specifically, the Power Plus guide goes into detail, and the BleeqUp app guide covers turning footage into something shareable.
FAQ
What accessories do I need to record cycling videos?
Three things matter most: a capture method that requires no setup, a way to start and stop recording while riding, and enough battery for your longest realistic ride. Everything else is optional refinement.
Do I need a camera mount for cycling?
Not necessarily. Camera glasses remove the need for a mount entirely, which reduces both the accessories you carry and the chance that you leave the whole setup at home.
How long can camera glasses record continuously?
BleeqUp Rover records up to about one hour of continuous video from the glasses, extended to roughly five hours of recording with its own power bank, subject to capture settings and conditions.
Are expensive cycling accessories worth it?
Only where they remove a reason not to record. Capture control and battery extend what is possible; many other accessories simply add weight and setup steps without improving the footage you come home with.
What is the best lens for recording rides?
It depends on the light. A darker or polarised lens suits bright midday conditions, while a lighter or photochromic option is more usable in low or changing light. Having one alternative lens covers most rides.


